Putting Together a Simple Outdoor Lunch That Travels Well
As with any day out on the trail or in the hunting field, a long day can turn a poor choice of lunch into a real hassle. Poorly packed foods can leak, bruise, spoil or be a real pain to eat whilst on the go. Planning for a single ordinary day of hunting (a hunter leaving before first light for a morning sit, then returning to retrieve his or her gear and walking back to vehicle for a long loop around home before returning to the house) helps to decide what is useful to take.
Start with the outing, not the recipe
For a day such as this, the items for lunch will go through several uses. Initially, they will be in a warm car. Then they will be in your daypack for hours, possibly in your cold and/or damp hands. And they will sit until you decide whether you are going to come home early or not. Thus, the meal you plan for your lunch will not be a perfect table meal.
1. Where will you be eating your lunch? A short hike to your vehicle may give you more options for where to eat your lunch than a long distant lunch site. A concealed hunting position may require foods that can be opened and eaten in small portions and, occasionally, devoured in one or two swift mouthfuls. A long ridge walk may mean you pack in compact form and find easy access to the various foods in your lunch pack.
The amount of food to take on a hunting trip needs to be estimated by the number of hours one intends to be in the field and the type of activity one will be doing. A light meal of a sandwich and a few snacks would be sufficient for a half-day's hiking on mild terrain but for longer trips of very rough country in cold weather, a more substantial amount of food needs to be carried.
Build the meal from sturdy components
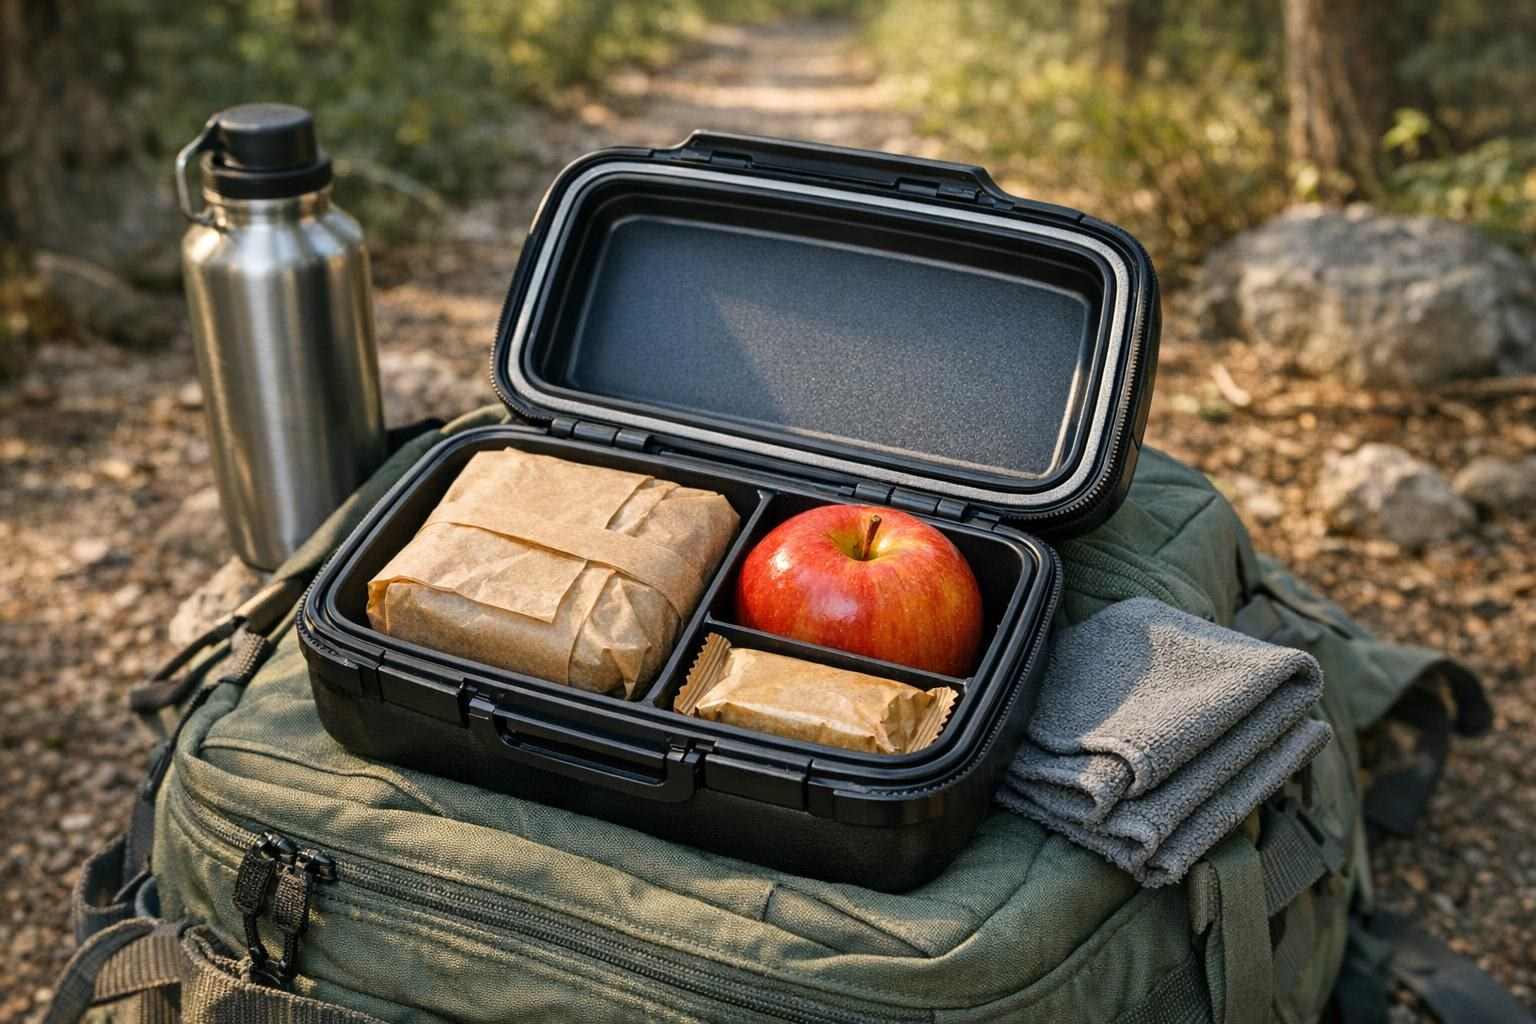
When selecting food for a packable meal, choose foods that will hold up well to being carried in your pack. A sandwich made with a firm filling such as dense cheese, sliced meats, nut butters or less-wet vegetables are good choices for the main portion of your lunch. Whole fruits such as apples, oranges, bananas or avocados, as well as dried fruits, crackers, trail mix, or other solid baked goods make good side dishes that will not get crushed and need to be eaten before they get too spoiled to eat.
You can also bring side dishes such as whole fruits, dried fruits, crackers, or even a trail mix and a number of other packaged baked goods to eat along with your main course. Of course, on very rough routes you will need to choose between side dishes that do not get crushed and others that do not get destroyed and become a pulp.
Even with a short meal the leftover snack should not be easily forgotten. A normal amount of a long-lasting food such as energy bars, nuts, jerky or similar can be placed in a separate pocket, to be easily found later when things didn't quite go as planned.
Control moisture, crushing and noise
Most failures with foods for hiking into the backcountry have nothing to do with taste. They have everything to do with moisture, crushing, and noise. Keeping wet ingredients in between dry ones and packing them separately from the rest of your lunch until you are ready to eat it helps to keep things fresh. Using a rigid container for wet or bruise-prone foods such as grapes, apples, pears or nectarines is also recommended. For sandwiches, use a firm bread such as a baguette or ciabatta and encase them in a stiff outer wrapping such as plastic or aluminum to prevent moisture from entering and contents from leaking out.
To protect fragile fare pack it in a hard-sided container. If you only have a reusable food storage bag then a firm sandwich with dry snacks will work fine. A leaky item can be a disaster, especially if it's to be buried at the bottom of your pack and later press against your maps, spare gloves and other valuable optics accessories. Pack items to be eaten on a break at the top of your pack. Conversely items that you need to protect from are best at the bottom of your pack.
Of note in regard to noise is that of packaging. In general most dry foods can be re-packed into containers prior to going out. Then if needed, the original packaging can be brought along as well for future reference as to the contents of the packets. A clean, sealed container is far more valuable than a piece of packaging that may open or leak in your pack.
Make food safety a packing decision
Before packing a meal consider the food safety aspects. This includes washing your hands and any other surfaces that come into contact with your food before preparing it. Also ensure that raw food is stored away from ready to eat food to prevent the risk of food poisoning. When using utensils and surfaces to prepare your food ensure that they are also clean. Chili foods that require refrigeration before you leave on your trip should be chilled and then packed with suitable cold storage for the trip.
A cool pack is not the same as cool prudent judgment. Take into consideration the original refrigerator temperature, the external weather, how long it is going to be before you consume the article and where it is going to be. Remember that even when refrigerated, perishable food has a limited life. When in doubt, throw it out! Find out the current food-safety requirements and recommendations for packing meals with perishable ingredients from your local public health authority.
Be sure to bring enough for your lunch break to clean up with (e.g. wipes, small napkins, etc.) as well as a sealable bag to put any waste in and a way to keep soiled items from getting into the rest of your gear. Remember to pack out all of your food and other trash from your lunch break and avoid leaving any behind at your rest point. Such trash can attract wildlife to the area and detract from your low-impact hunting experience on future excursions.
Match the container to the distance
A container system for your food must solve a problem or set of problems and not just add weight to your pack. A good lunch box for a short day out might be a rigid sided lunch box but for a longer day a good quality sealable bag and one good quality container might be better. A wide opening is useful for eating with cold fingers and a good tight seal is important in case your pack is tipped over or laid down on a wet surface.
As with water, the planning for dry food should also take into account the length of time one expects to be out on the trail and the conditions that they will encounter. For short trips near one's vehicle, the extra weight of a variety of dry foods may be worth carrying for the flexibility they provide for impromptu lunches. However, for longer trips, it is better to choose a few foods that can be eaten in a variety of combinations.
In the minutes before leaving, make sure your packed lunch won't leak or get crushed by lifting it up and turning it gently. Check that the main meal, the backup snacks, the water and the means to clean up after yourself are all within easy reach. It's surprising how often a single leaky item can ruin your whole day.
Keep the plan repeatable
Remember that a good outdoor lunch consists of the same number of ingredients every time you go out. Depending on the nature of your trip, use the following combinations of ingredients: A solid sandwich with some fruit for short day hikes, a tortilla wrap with some dry snacks for long, moving hikes, and separate ingredients for hikes where texture and moisture are a problem. On return, note what didn't get eaten, what got crushed in your pack, and what was difficult to eat given the time available to you.
For those hunters who rise before the sun to head out to their hunting location, a simple yet solid meal plan of a single filling main item, one durable side item and one backup snack item, along with plenty of water and a means to carry out any trash, will provide for the best hunting food plan. It is not supposed to be complex or novel, simply good enough to give the hunter something to look forward to and to refuel for the rest of the hunt.